
Using Diazo Photo Emulsion - Tips, Tricks and Troubleshooting
We are often asked for guidance with screen printing and the most common request is for help with exposing screens.
Benjamin Franklin is quoted as saying “By failing to prepare, you are preparing to fail” – I don’t know how good he was at screen printing but it sounds like he had some experience! One of the most common problems is, when using a new light source, to assume the exposure times will be the same as the guidance/previous lamps. A successful Photo Emulsion Stencil will depend on many things: the wattage of the lamp, the timings, the distance from the screen and the thickness of the emulsion.
Preparing your screen
To start with you must ensure that your screen is clean and dry, any grease (even from fingers) can cause problems with the emulsion adhering correctly. The best products we have found for cleaning screens prior to coating is Speedball Speed Clean. This should remove any trace of grease. Make sure you wash the cleaner thoroughly off the screens and then leave the screen to dry fully.
Mixing your emulsion
The next step is to coat your screen. We would advise coating the screens in a room with subdued lighting – no need for a safe light but subdued light does allow you a little more time to coat your screen.
If you are using new emulsion, it is best to mix it an hour or so in advance so that all the bubbles can disperse. Photo emulsion is made from two parts: the emulsion itself and sensitiser. The sensitiser is in powder or gel form in a tiny quantity in the bottle. It needs to be thoroughly mixed with water in the bottle before it is added to the emulsion. You can watch a video showing how to mix up your emulsion here.
Coating your screen
To coat your screen, use a coating trough. The aim of coating screens is to fill all of the holes in the weave of the mesh, not to deposit a couple of mm on top of the mesh. You will need a trough that is slightly narrower than the width of the mesh on the screen. 225mm troughs are perfect for our A4 screens, 315mm troughs for our A3 screens etc.
You can watch a video about how to coat a screen here, or read on for instructions.
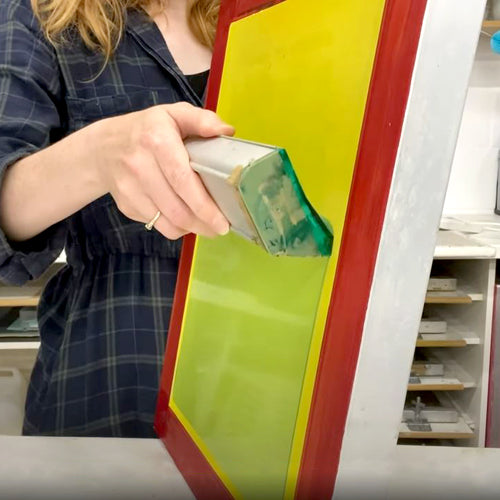
First, half-fill the coating trough with pre-mixed photo emulsion.

Hold the screen in one hand and the trough in the other. We want to coat the flat side of the mesh, where it is flush with the frame. Make sure your fingers are not wrapped too far around the bottom of the trough or they can drag marks up the screen.
Tilt the screen slightly backwards. Start the trough at the bottom of the screen, slightly higher than where the frame ends. Tip the trough until the emulsion reaches the mesh all the way along. Tip the trough a little steeper and gently drag it up the mesh until you get to the top. Then pause for a second.

To avoid drips at the top of the screen, slightly tip the screen towards the trough, maintaining contact between the trough and the mesh. This allows the trough to catch the excess emulsion.

Next, place the screen upright and use the trough to drag up the screen (without tipping it this time). This will scrape away any uneven or thick areas of emulsion on the screen, particularly any thick edges. You can do this on both the inside and the outside of the mesh to ensure an even coat.
The rest of the emulsion can be scraped back into the pot. Store the emulsion in the fridge for up to 6 months. Wash the trough straight away. It's important to keep it clean, especially the edge that touches the mesh: any mark on this edge can ruin an even coating of emulsion next time.

Dry the screen horizontally, printing side up somewhere dark. It is good practice to put some wedges (blocks) under the frame to allow the air to circulate.
Troubleshooting screen coating
Your coat is too thick - use the trough (without tipping it) to scrape up the screen to remove any thick areas of emulsion.
There are blank spaces left without emulsion - there is either not enough emulsion in the trough, or you didn't wait long enough for the emulsion to be touching the mesh all the way along the trough before dragging it up the screen. Coat again (you shouldn't have to wash the screen again if you do this straight away), this time more slowly.
There are marks in the emulsion - this can be caused by dragging fingers or other objects touching the mesh. This can also be caused by dust so make sure your screen has been thoroughly cleaned before coating.
Preparing your screen film
When the screen is completely dry you are ready to expose your screen. leave it in the dark space until you are completely ready to expose the design. The next crucial part is the positive. This should be printed on screen film and be very dark so that light cannot pass through the dark areas - you can test for this by placing the positive on a lightbox or holding up to a window. We have packs of Inkjet Screen Film available or can print Film Positives for you.
Any areas that you want to print need to be in 100% black, the rest must be transparent. You don't want a negative (where the black and white are reversed). Usually, you will want the design to be the correct way round and not back to front.
Using an exposure unit
Some exposure units have lights below, others from above. Whichever unit you have, you must ensure tight contact between the positive and the screen so that travelling light cannot spoil your screen.
Using a lamp or home build exposure unit
For more in depth instructions about exposing a screen at home, see here.
Speedball have made a lamp specifically designed for exposing screens. You can find it here.
If your exposure unit or set up has a light from above, use a piece of black foam rubber under the screen with the printing side of your screen facing up. Place your positive on top of the screen and then secure and emulate a vacuum by placing a sheet of glass on top of the acetate.
Figuring out the right exposure time
The exposure timings will depend on your lamp and the distance between the screen and the lamp. As a basic rule, the lamp should be at least the distance of the longest side of your screen away.
The best way to work out timings is to do a graduated exposure (a bit like black and white photography). Use a piece of opaque black card and place it over your screen allowing about 1/5 of the screen to be exposed. If you are using an A4 screen, start with an 8 minute exposure then move the card to about 2/5 for a further 2 minutes (10 minutes), then move the card to 3/5 for a further 2 minutes (12 minutes), then move to 4/5 for a further 2 minutes (14 minutes) and then remove the card fully for a last 2 minutes (16 minutes). Turn off the light and look at your screen. Where the positive has been, the emulsion should be a lime colour. The rest of the screen should be darker. When washed (see below) the emulsion should react differently depending on the length of time that it was exposed. Using this method should determine the optimum time. Where the emulsion washes out entirely (both the positive and negative image) it is underexposed, where the positive image is very hard to wash out it is overexposed. Now you have your optimum time, you are prepared to expose your real screen.
Washing your screen
As soon as your screen has finished exposing, wet it on both sides. This will haul the exposure to make sure it's not over-exposed. Leave the water to soak into the emulsion for 30 seconds to a minute.
Use a hose or a jet wash to force the unwanted emulsion from the screen. The areas of your design should wash clean. The emulsion on the background should be hardened by the light and stay on the mesh.
Troubleshooting exposure and screen washing
The design has not washed out of the screen - the screen could be over-exposed. You may need to lower your exposure time. It could also be that your screen film is not opaque enough. Try doubling up the film or getting one printed by Handprinted instead. It is also possible that you screen became over-exposed after it's initial exposure. Carrying your screen through a light area or leaving it too late before washing it can over-expose the screen.
The background emulsion has started to come off the screen - the screen could be under-exposed. You may need to lengthen your exposure time. It's also possible that you were too heavy handed with the screen cleaning. Using a jet wash too forcefully, too close to the emulsion or for too long can damage the emulsion. Using anything abrasive on the screen can also damage the emulsion.
The design detail has not come out well - it could be that your design it too finely detailed for your screen. To see more about detail on screens, read here. To achieve more detail on a screen, a higher mesh count may be needed. It is also possible that the screen is slightly over-exposed.
The emulsion is peeling off - the emulsion was likely laid too thickly on the screen and needs to be re-coated more thinly. Make sure to scrape excess emulsion off your screen when coating.
Cleaning the emulsion off the screen
When you have finished printing the design, the image can be removed using Photo Emulsion Remover. You can watch a video on this process here.