
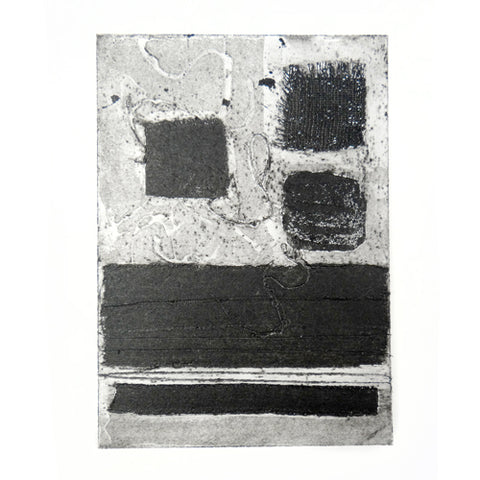
Collagraph Printing
Collagraphy is a really versatile printing process in which a textured plate is inked up and put through a press. Different textures hold varying amounts of ink and print different tones. Anything with a low relief texture can be stuck down and used: wallpaper, leaves, fabrics, tapes and threads etc.
The collagraph plate is then varnished and can be printed intaglio or relief. This is our method of creating and printing collagraph plates intaglio.
If you would like to start with something a little quicker that does not require varnishing your plates, try our Easy Cardcut Collagraph project featured earlier on our blog.
Start with a piece of mount board cut to size. Begin choosing and cutting down the pieces to stick on top. We started with some thin cotton. Stick your fabric down with PVA glue. Take care where you paste your glue as areas of PVA will print differently when inked up.

Drizzled PVA glue creates a raised area that can be wiped clean whilst holding ink around the edges.

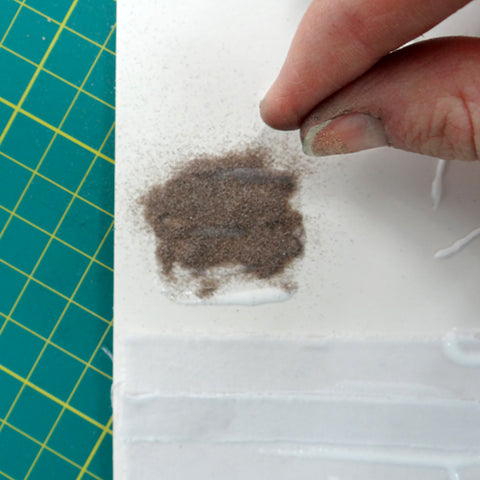
Use carborundum sprinkled over PVA glue to create a rough texture that holds lots of ink.
Try open weave fabrics such as scrim.

Threads will hold ink too – experiment with gluey threads dropped onto the surface.
Another way of creating a textured collagraph plate is by using filler. Use a palette knife to spread a thin layer of paste onto the block. The edges or the filler will create the most contrast in your print so use them creatively.

Pressing and drawing textures in the block will create more areas for the ink to be held.

Pressing objects and fabrics into the filler will change the texture of the plate.

When your plate is completely dry (this usually takes a couple of hours) it is ready to be varnished. Shellac works very well at protecting and strengthening the plate and making it wipe-able.

Again, allow your plate to dry completely (another few hours) and then you are ready for inking. Prepare your paper by soaking it in a tray of water. We are using a 300gsm paper stock as it needs to be strong enough to be strong when wet and not tear when embossed with the raised areas of the plate.

We are using Hawthorn Stay Open Oil Based Inks mixed with Linseed Reducing Jelly – this reduces the ink to a more workable consistency for intaglio printing. You only need a little linseed jelly to dramatically change the consistency
of the ink. The Dense Black ink that we used is particularly sticky so we used the quantities shown above.
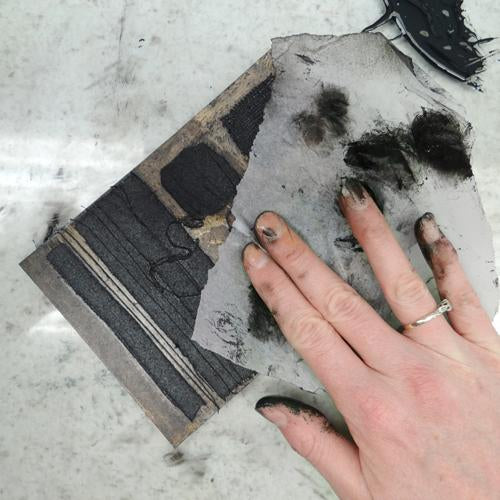
Work the ink into the plate with a stiff brush – a toothbrush works perfectly. Pay particular attention the the areas that you want to hold the ink.

Work the ink into the plate using a piece of scrim. Use the scrim to begin to clean the ink of the mount board ground and any other areas that you want pale.

Use a flat piece of tissue paper to polish the plate, concentrating on the pale areas. Finish by using a clean piece of fabric to clean the edges and any areas that you would like to print as close to white as possible.
When your plate is inked up, place it on the press bed. Use a registration sheet to ensure your print is centred and straight.
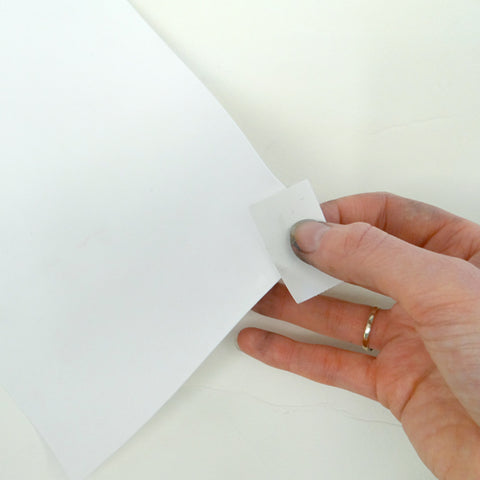
Remove your paper from the tray using paper fingers as seen below to keep it clean. Blot between pieces of blotting paper. You want the paper to be damp but not wet. This way it will draw the ink out of the recessed areas of the plate.
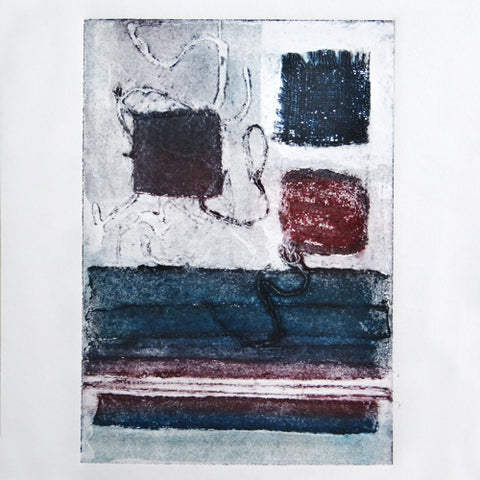
Put your paper on top of the plate and through the press. Remove your print to see the result! If the pressure is correct, you should see an embossing on the back of the paper but none of the areas should have pushed all the way through!
If your print is very pale there may not be enough pressure. If your print is too dark and sticky there is too much ink and your plate needs more cleaning before printing.
You will need to re-ink your plate before printing again.
For plates made with filler, ink up and print in the same way.


You can print your plate in different colours by printing a la poupée – using a wad of fabric to ink different parts of the plate separately. You can also use a brush as before, concentrating on each area at a time in your desired colour. The colours will blend a little when cleaning the plate with scrim and tissue.

Clean up the your plates, inking slab and tools with Zest-it – a more environmentally friendly alternative to white spirit.

To make your own collagraph you will need:
- Mount board
- PVA glue
- Fabrics, papers etc. to create texture
- Carborundum
- Wall filler
- Shellac
- Paper to print on
- Tray in which to soak paper
- Inking tray or glass slab
- Palette knife
- Hawthorn Stay Open Ink
- Linseed Reducing Jelly
- Stiff brush or toothbrush
- Scrim
- Tissue paper
- Fabric for cleaning plate
- Zest-it, white spirit or oil for cleaning up ink
- Etching Printing Press