
Getting a Drawn Design Ready for a Screen
Screen printing is a brilliant way to make the most of your hand drawn designs. It enables you to print them multiple times for framed artwork or cards or to create your own fabrics, bags and t-shirts. You can use your designs to make into photographic screens yourself at home or we can make them here for you at Handprinted. However you’re making your photographic screens, you’ll need to get your artwork ready.
An important rule for making photographic screens is that your design needs to be full black and white. This is different to a grey-scale image (like a black and white photograph) which has tones of grey. The whole of your design needs to consist of only completely black and completely white areas. In this post we’re going to look at creating screen-ready artwork from hand drawn, scanned designs.

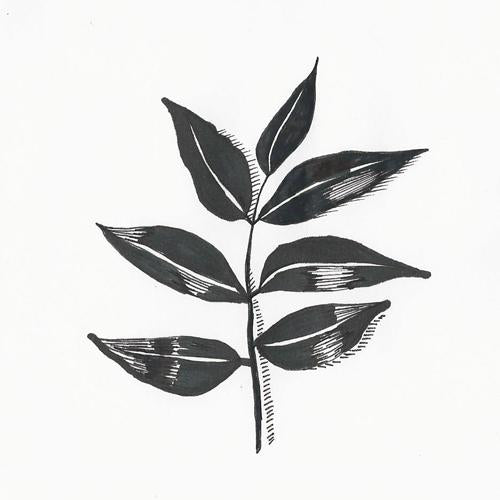
The image above is a hand drawn design for screen printing. It consists only of black and white areas and has been made screen ready in Adobe Photoshop.
When screens are exposed they are coated with a layer of light sensitive Photo Emulsion and Sensitiser mix. The emulsion coated screen is exposed to a light with a printed film of your design between the light and the screen. When the emulsion is exposed to light, the black areas of the design block the light, stopping it reaching the emulsion. The white areas of the design (transparent on the film) let the light through, allowing the light to expose the emulsion. The exposed areas of emulsion go hard and block the holes in the mesh – ink will not go through these areas. The unexposed areas stay soft and washable – the soft emulsion washes out of the screen creating open mesh that ink can pass through.

Creating a Suitable Drawing for Screen Printing
Some drawn designs will be suitable for creating screens and others will not. The first drawing below has been drawn with pencil with lots of shading. These grey tones will not be suitable for making a screen as they will not be able to create clear areas of open and closed mesh. The second drawing has been drawn in pen. Shading has been achieved using thin hatching. This design is made up of just black and white areas so will be suitable for a screen! Drawings in pen will always be easier to work with than drawings in pencil which will need a lot of darkening to make them fully black.


If you’re sending your design to Handprinted to have a Custom Exposed Screen made you will need to scan your drawing and get it ready. Here are a few basic ways to get your image ready for a screen using Adobe Photoshop. There are lots of free or cheaper programmes that will have similar tools that you can use too.
Preparing a Scanned Drawing
When you scan your drawing into your computer the background will usually come out slightly off-white and your black areas will come out dark grey.

To lighten up the background and darken your image you can use Levels. Go to Image – Adjustment – Levels and a box will appear with a graph on it. This graph shows how your light levels look. There are three arrows beneath the graph. You can move these arrows left and right to change the levels. Move the left arrow to the right until it reaches the first ‘swell’ on your graph. Move the right arrow in to the left until it reaches the large ‘peak’ in the graph. You can adjust the middle arrow to the left and right to adjust the mid levels. Click OK when you like what you see.

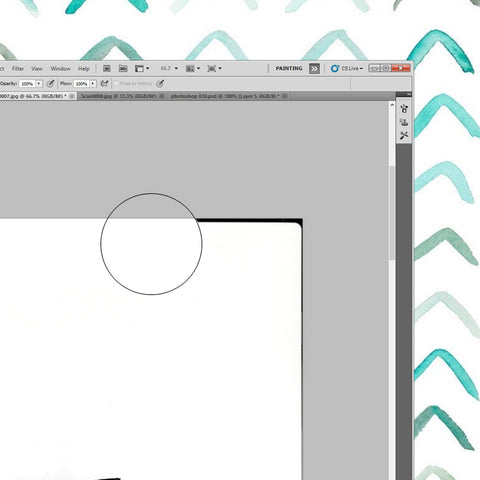
Scanned images often come through with dark edges and spots of dust from the glass of the scanned. You can get rid of these with the Eraser Tool shown below. Make sure the two boxes on your tool bar are black at the top and white at the bottom (shown at the bottom of the picture below) by clicking the tiny boxes above.

Use the Eraser Tool to get rid of any dark areas and marks.
You’ll need to make sure that your image is on the right size document for making a screen. Go to the top bar and click Image – Image Size to check the size. This image is for an A4 screen so we need our document to be 21cm x 29.7cm. Set the resolution to 300 pixels/inch to make sure it’s a high quality image.

If your image is not the right size you can change it by cropping. Select the Cropping Tool from the side bar. Put your desired dimensions into the Width and Height bars at the top and then drag your Cropping Tool over the image to resize it and press Enter.

It’s best to create screen films from PDFs as the format ensures that everything stays the correct size as you want it. To save as a PDF go to File – Save As and then select Photoshop PDF from the drop-down menu.

Getting Rid of Pencil Lines
If you have created your scan from an original drawing there may be sketch lines and pencil lines that you need to remove.

Firstly, use Levels to lighten the background and darken the image, as before, by going to Image – Adjustment – Levels and sliding the arrows left and right.

You can remove any left over pencil lines using the Dodge Tool you’ll find in your tool bar. The Dodge Tool, pictured below, lightens up the background. At the top of the screen, set Range to ‘Highlights’ and Exposure to around 50%. Use the tool to remove the pencil lines.

Once your designs look full black and white and are on the correct size document they are ready to be made into screen films to make your exposed screens. Send your designs to us for Custom Exposed Screens or use them at home!