
Heat Transfer Printing a Collage
Transfer printing is a quick and playful printmaking method. The dyes require no fixative – only heat! They can be mixed up and left in a covered pot to use another day – they should keep indefinitely.
Pour 100ml of warm water into a pot.

Sprinkle 1tsp transfer dye onto the water. Use colours straight out of the pot to combine them to make your own shades. We particularly like a 50/50 mix of Royal Blue and Lincoln Green. Make a pot for each dye colour you would like to use.

After five minutes, paint the dye onto paper. We use 80gsm copy paper as the heat will travel through it very easily. If you want the paper to wrinkle less, you can use something a little more sturdy.

You can paint flat colour or experiment with mark making.

Leave the painted papers to dry. For really bold colours, repaint the papers with another layer and dye and leave to dry again. These papers can be used at any time for heat transfer printing.

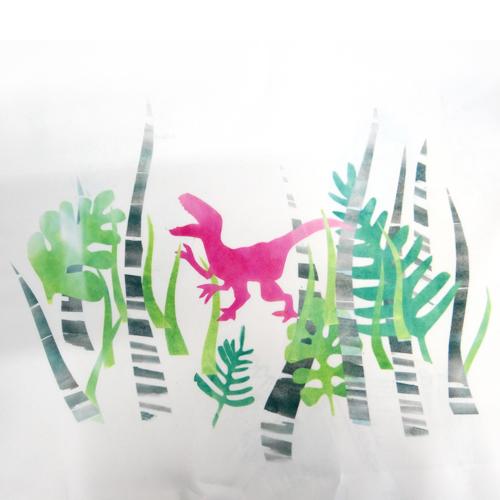
When the papers are fully dry, cut them into shapes to begin constructing a collage. Use scissors or a scalpel and cutting mat.

When you have cut out enough shapes you are ready to assemble the collage.
Lay a piece of baking parchment onto a padded board or ironing board. Lay the fabric over the top. Transfer dyes need to be used with synthetic fabrics – polyester works very well, especially polyester fleece or satin.
Arrange the papers with the painted side down to the fabric. Remember that the shapes you place down first will be the top layer once printed.

Carefully cover the collage with another sheet of baking parchment or a silicon sheet. Use a dry iron on the hottest setting to carefully heat up the print. Move slowly over the fabric, trying to evenly cover the whole design. You can take a peek at your design by gently peeling up the baking paper to see if the colour is strong enough.

Lift off the baking parchment and the pieces of paper to reveal your print! The dye is now fixed and washable.
You can choose to add more layers of colour by placing more shapes on top and ironing as you did before.
The shapes can be used again to create another print but each time they will produce a paler colour. You can charge up the colour again by painting over the top with a fresh layer and dye and leaving it to dry.

For this project you will need:
- Transfer Dyes
- Measuring Jug
- Measuring Spoons
- Clean, empty pots
- Paintbrush
- Plain paper (we used 80gsm copy paper)
- Scissors or scalpel and cutting mat
- Synthetic fabric such as polyester
- Iron
- Baking parchment
- Iron