
On The Course: Creating Life Drawing Mono Screen Prints
I (Bridget) was lucky enough to take part on last years Life-Drawing Monoscreen Printing workshop with Tricia Johnson. During the course, we worked with a life model to create painterly screen prints using the mono screen method. We used acrylic based screen printing inks and painted directly onto the mesh using a variety of brushes.

We started the session with a couple of warm-up exercises. Working on rough sketches, continuous lines, and other drawing techniques. I have never been very confident with life drawing and hadn't done it since my Art A-Level. Luckily Tricia was on hand to give advice and talk us through the process.

Once we had completed the warm-up tasks, Tricia gave us a quick demo painting directly onto the screen from the model's pose.

The screens that we were using had a pre-exposed aperture, however you could do this technique on open mesh. To make sure that our paper was always in the same place we needed to register it. We did this by placing a sheet of black paper underneath our aperture. Once we were happy with the position, we placed registration markers (mount board and a bit of masking tape) up against the edges of the sheet. When our registration marks were in place, we were able to get started!

I decided to start off using one of my initial sketches as a reference as I quite liked the composition and pose I had captured.

I placed my drawing underneath the aperture area of the screen and used a soft pencil to sketch out my outline. Although the mesh on these screens is pretty robust it doesn’t particularly like sharp edges so it is important to remember to only use soft materials when drawing directly onto the mesh.

When I had completed transferring my outline, it was time for the fun part! We used acrylic screen printing inks made up of Acrylic Paint and System3 Acrylic Medium. These inks are a little stiffer than pre-mixed inks which makes them great for this process. I began by laying down a rough outline and then applied my highlights and some shadows. For this print, I wanted to try a more painterly effect and keep some of the brush strokes visible. To achieve this, I filled in any areas that I wanted to remain white with the medium.

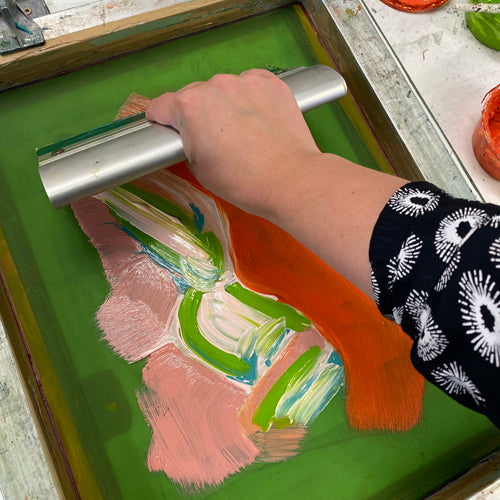
When I was happy with my design, I applied a small bead of acrylic medium at the top of my design and then took my print, pulling the squeegee down the screen at a 45° angle.

Here is how it came out! I love the painterly brush strokes and the flatness you can achieve with this method.

Throughout the day we worked on our own compositions as well as a couple of quick activities in which we focused on the negative space around the figure, shadows and highlights and used graphite sticks to draw directly onto the mesh to add line work and detail.
The final prints by myself and the group.


Like the sound of this workshop? Why not join us in the Handprinted Studio on Wednesday 7th July 2023 to create your very own series of painterly screen printed life drawing prints!