
Using Textile Foil with a Thermofax
Textile Foil is a brilliant way to bring more vibrancy to your fabrics. It’s available in a wide range of colours and is easy to apply using Foil Adhesive. It’s even washable!
In this project, we have applied the Foil Adhesive using a Custom Thermofax Screen. A thermofax is like a small silk screen that can be made with your own designs. They’re great for quick printing on fabric and work really well with the adhesive. You could also apply the adhesive by screen printing, painting or woodblock printing!

We drew our image for our Thermofax , follow this blog if you would like to create your own design for thermofax. A full black image like this drawing can be scanned in and sent to us, ready to be made into a Custom Thermofax.


Just like when screen printing, the ink (or in this case, Foil Adhesive) is placed at the top of the screen. A Thermofax Squeegee is then used to drag the adhesive down the screen, through the open areas of the mesh.

The Thermofax can be lifted and moved around the fabric, adding more layers of print.


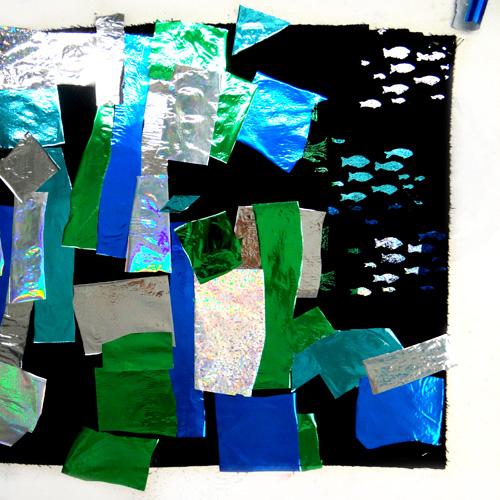
Textile Foils come in lots of colours and textures. For this image, we chose Turquoise, Blue, Green, Silver, Iridescent and Confetti.

Leave the adhesive for about 15 minutes to become touch dry. Cut up the foil and place shiny side up over all the areas of printed adhesive. It doesn’t matter if there are a few overlaps – the colour at the bottom will stick to the adhesive.

Cover with baking parchment and iron for 20-30 seconds on each area.

Remove the parchment and begin to peel off the excess foil. If no foil is being left behind on the adhesive, recover and iron for a few more seconds.

Remove all the excess foil to reveal your fabric!
To create your own foiled fabric you will need:
- Custom Thermofax (or Indian Woodblocks, a Screen or a paintbrush to apply the adhesive)
- Thermofax Squeegee
- Textile Foil
- Foil Adhesive
- Baking Parchment
- Iron
- Fabric to print on