
Easy Block Printed Christmas Wrapping Paper
Using one sheet of Soft Cut, we carved four bauble shapes. First, the designs were drawn in permanent marker on the block. We then used the V tool from the Japanese Cutting Tool Set to carve around the outside of each bauble as well as to add some patter to the surface of each shape. Using a scalpel, it is easy to cut the shapes out, following the line of your V gouge all around the edges. For more pictures showing a similar method of carving, see our Block Printing on Fabric blog post.

Cranfield Water Based Block Printing Inks were perfect for this project. The inks dry quickly on the paper and the colours are bright and strong. This magenta ink was used straight out of the pot for our first colour. Only get out a little ink onto your plate at a time as water based inks can dry quickly. You can add a little extender or drying retarder if you like. Roll out a small square of ink in a thin suede-textured layer.

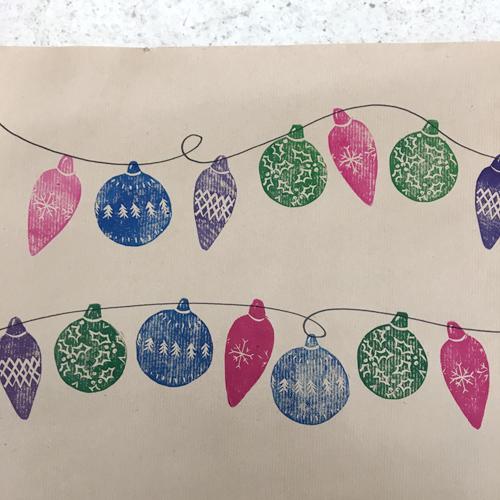
Draw a line along the width of our blank wrapping paper on which the baubles will hang (see below picture). Choose your first bauble and roll evenly with your first colour.

Place your bauble face down on your paper and press firmly all over the back.

Continue to scatter your pink baubles along the line.

When you have printed enough of the first bauble, ink up your second bauble using your second colour. This colour is Cyan mixed with Magenta. If your inks
have gone a little dry on your plate, liven them up with a little extender.

Continue to print your baubles on your wrapping paper in this way, alternating colours and patterns. Sticking to one colour for each bauble prevents faffing
around with cleaning.


When you’re finished, simply clean up your inks with soap and water and get wrapping!

To make this wrapping paper you will need:
- Plain Brown Paper
- Permanent Pen
- Cutting Tools
- Scalpel
- Soft Cut
- Cutting Board
- Cranfield Water Based Block Printing Inks
- Roller
- Inking Tray or Inking Plate
- Palette Knife